INF-250: Web Design and Development — GitHub Pages (and Pizza)
Remote Hosting
So far, we've been using CodePen to create and share our HTML projects. While CodePen is a great tool for quick prototyping, it's not a true host and doesn't work well for complex, multi-page sites.
We also looked at VScode, which is a powerful code editor that can be used editing files directly on your computer. The problem is, no one else can access your site when it only lives on your laptop.
In order for others to access your site, you need to host it on a web server.
Enter GitHub
GitHub is a website that stores code and tracks changes to it over time. It’s built on a tool called Git, which is a version control system.
It keeps track of What changed, When it changed, and Who changed it.
You can also think of GitHub as:
- A shared Google Drive for code
- A history tracker that remembers every change
- A place where people can collaborate without overwriting each other’s work
Key terms
Don't worry, you don't need to know how GitHub works beyond the basics for this class. But let's review some common terms:
- Repository (or "repo"): A folder for your project that contains all your files and the history of changes.
- Commit: A snapshot of your project at a specific point in time. Each commit has a unique ID and a message describing the changes.
GitHub pages
Why learn about GitHub if most of its features are beyond the scope of this class? Because of a service called GitHub Pages that allows you to host your websites for free directly from your GitHub repositories!
Step 1: Create a GitHub Account
If you do not already have a GitHub account:
- Go to https://github.com
- Click "Sign up" and follow the instructions to create your account.
- Use your school email if possible, and wait for the two-factor auth code.
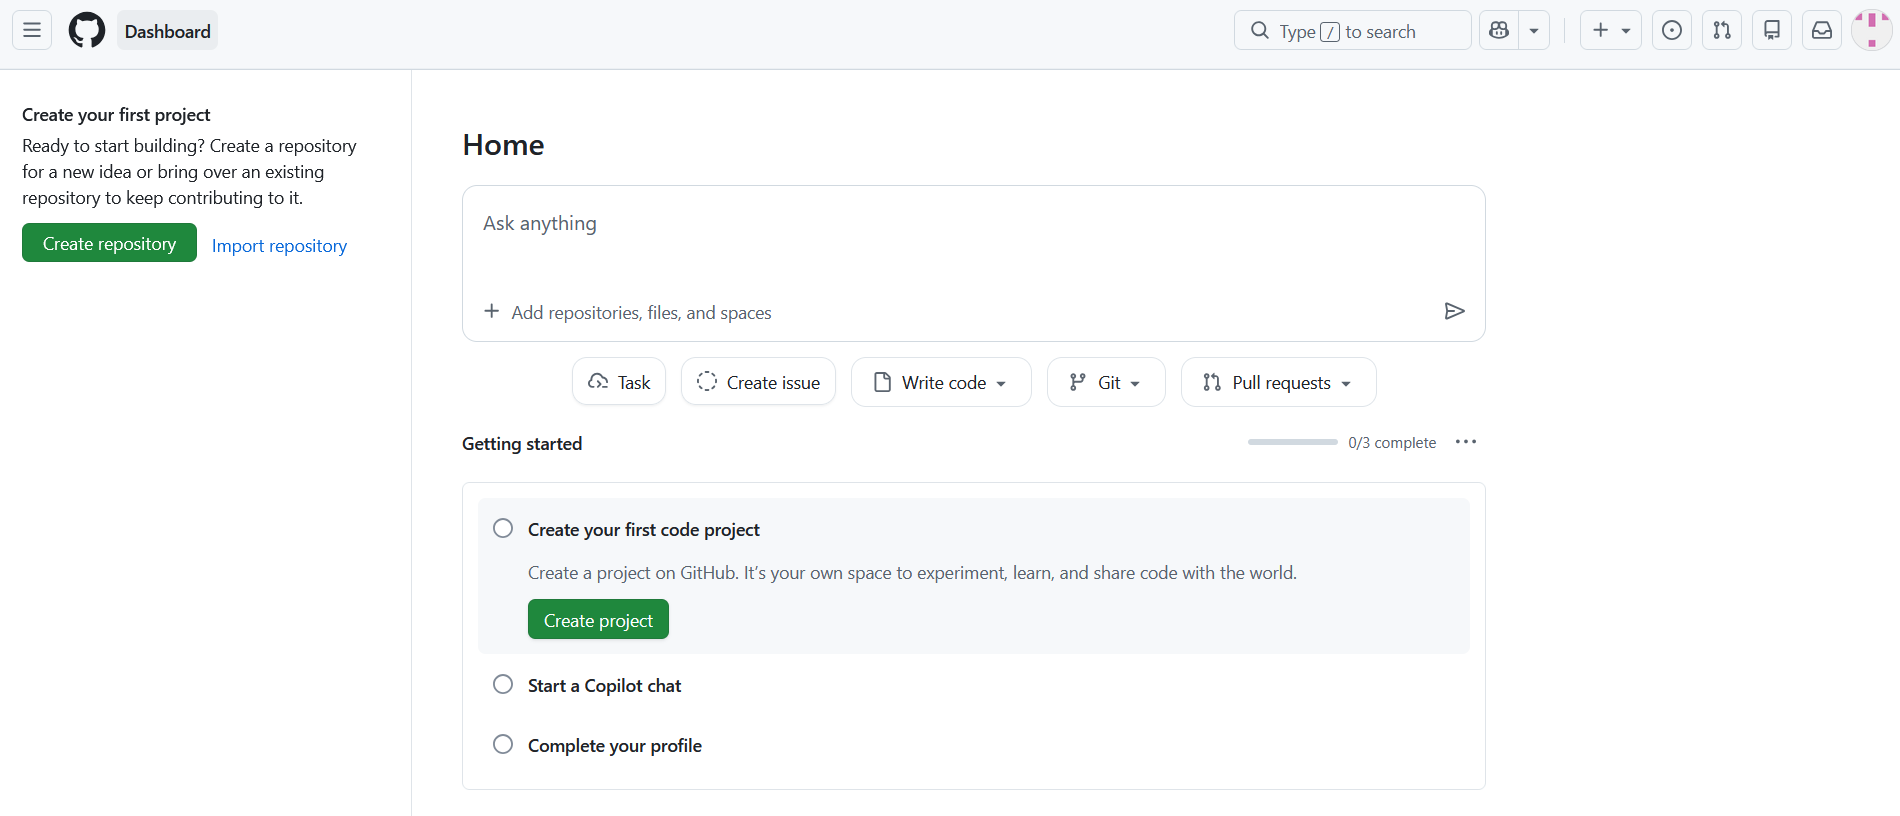
- Proceed to log in and you should reach your Dashboard.
Step 2: Create a New Repository
- From your GitHub Dashboard, click the green "Create Repository" button.
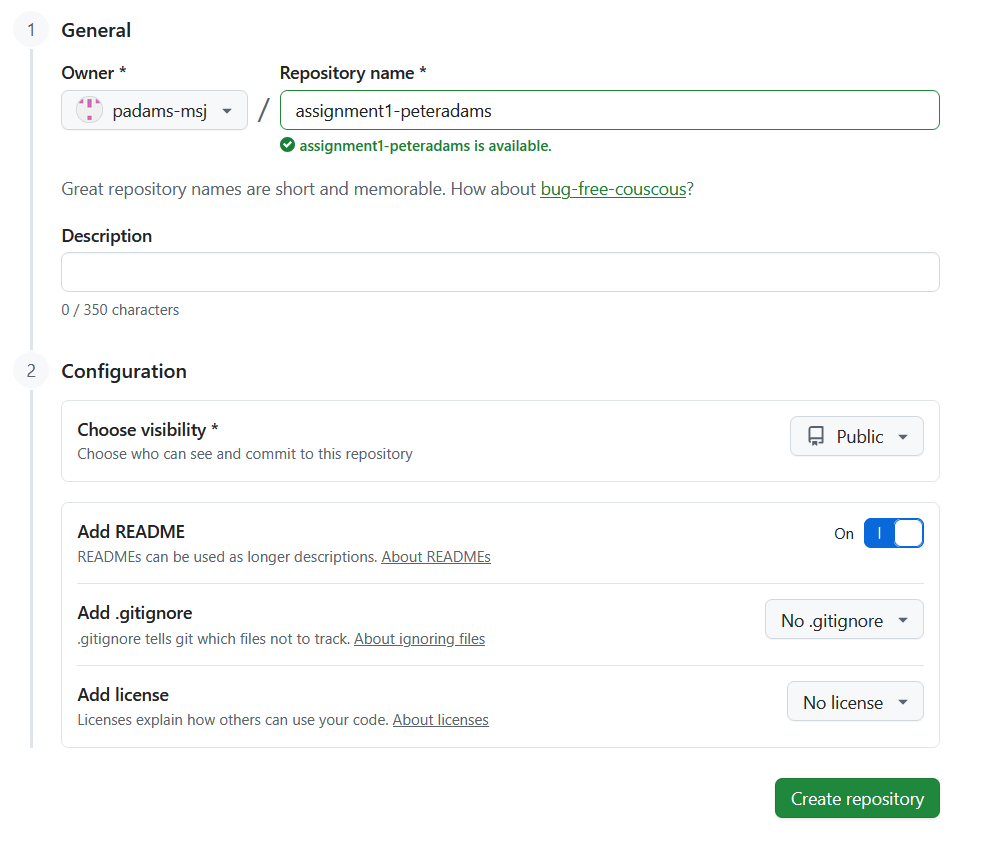
- Fill out the form. For Repository name, use the format
demo-[firstname][lastname], e.g.demo-johndoe. - Make sure
visibilityis set toPublic. - Check the box next to
Add a README file. - Click
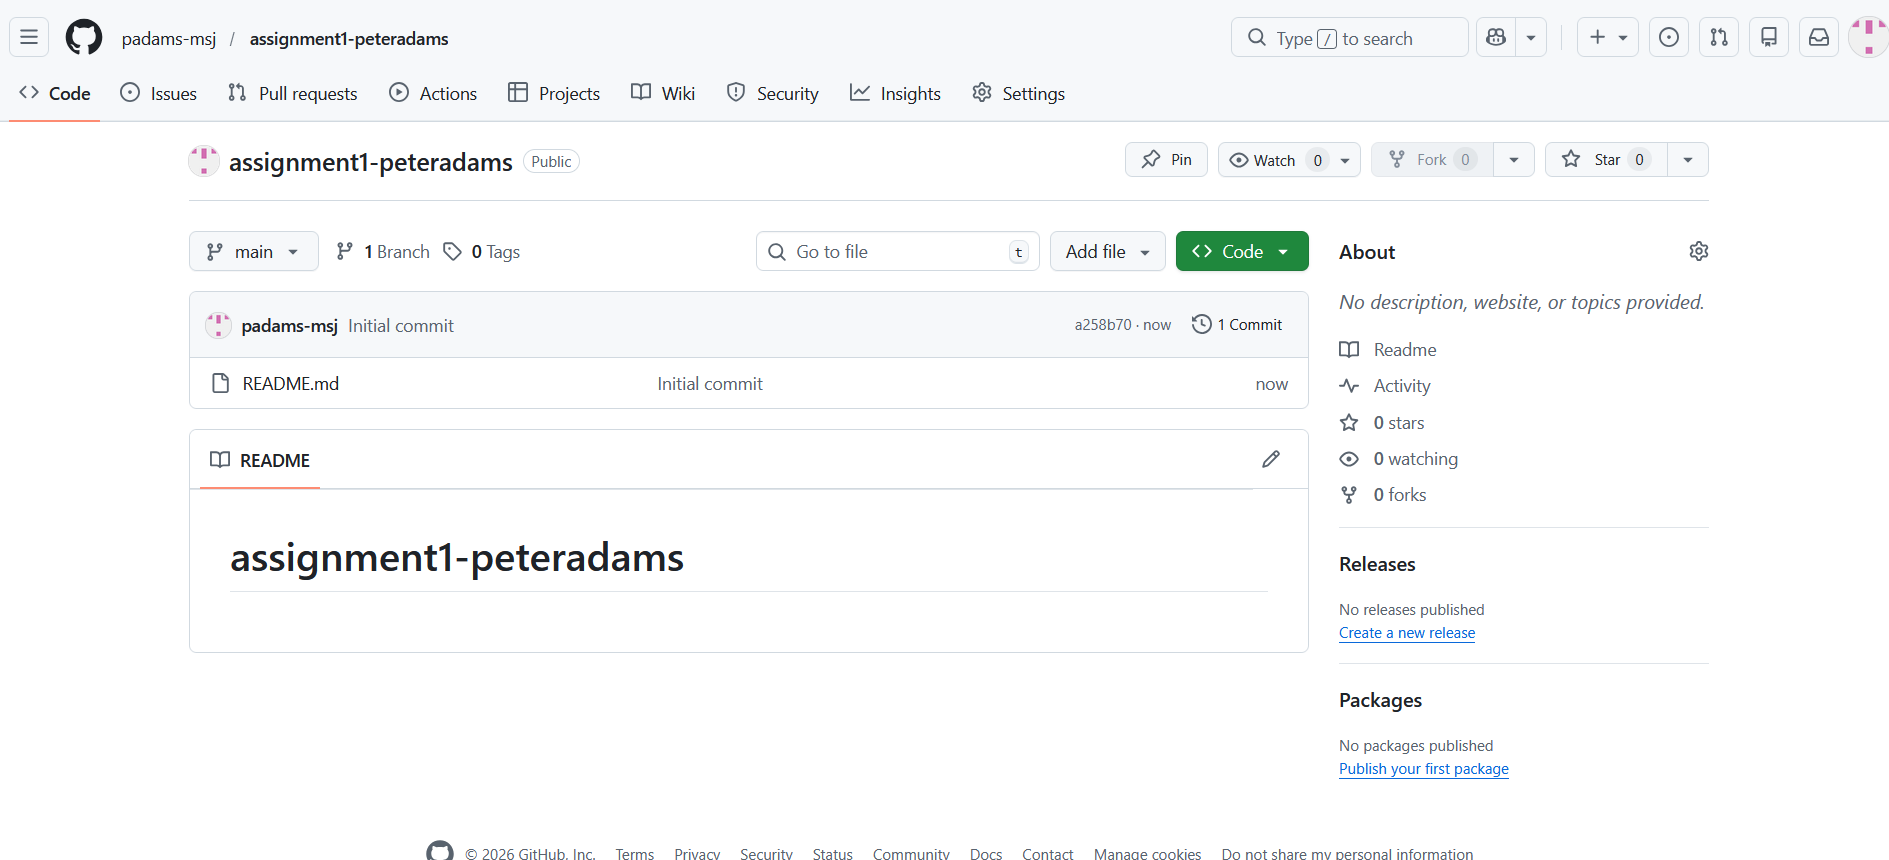
Create repository.
Step 3: Add Your index.html file
- In your repository, click Add file → Create new file
- Name the file exactly:
index.html - Using what we've learned, create a bare-bones HTML page using
<html>,<head>,<title>, and<body>tags. Add a simple heading and paragraph inside the body. Don't forget your doctype declaration at the top! - Click Commit changes, and confirm the popup window.
Step 4: Publish with GitHub Pages
For more in-depth info, go to this official GitHub Pages guide.
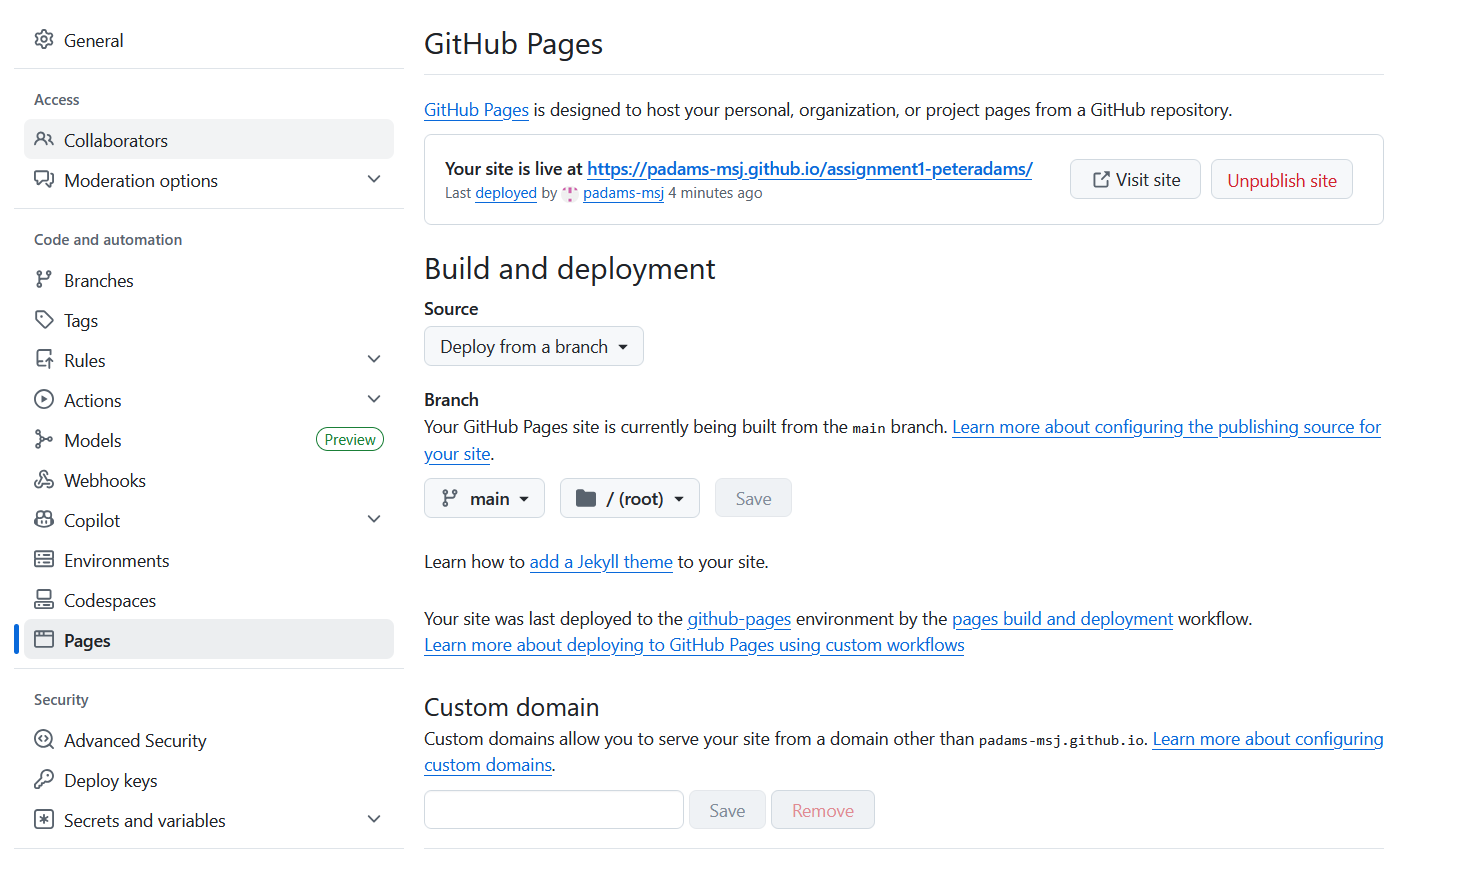
- In your repository, click Settings (the gear icon at the end of the nav bar.)
- In the left sidebar, click Pages (you may need to scroll down a bit)
- Under Source: Select Deploy from a branch
Branch: main
Folder: /root - Click Save. GitHub is now building your site. It may take a few minutes. Reresh this page periodically, and eventually you will see a "Your site is live" message with a link to your site.
- Verify the URL works and that you can view your site!
- Now that your site is published, you won't need to come back to this setting page. The URL will remain the same as you commit changes to your code.
Design break: local pizza edition
Journal entry
Hop back over to GitHub pages. Edit your index.html file and extend your demo site into a page about yourself.
Use correct <title> and <h1> tags to convey the main idea.
Write a few paragraphs about yourself - for example, describing your hobbies, schoolwork, family, friends, etc.
Make sure your HTML tags follow the rules we've covered in class.
For your submission, include a link to both the public site (something like https://padams-msj.github.io/demo/ ) as well as a link to the repository on GitHub (something like https://github.com/padams-msj/demo)
Make sure you include both links and that they both work!